Items
The main page is the one the users will access and handle the Items.
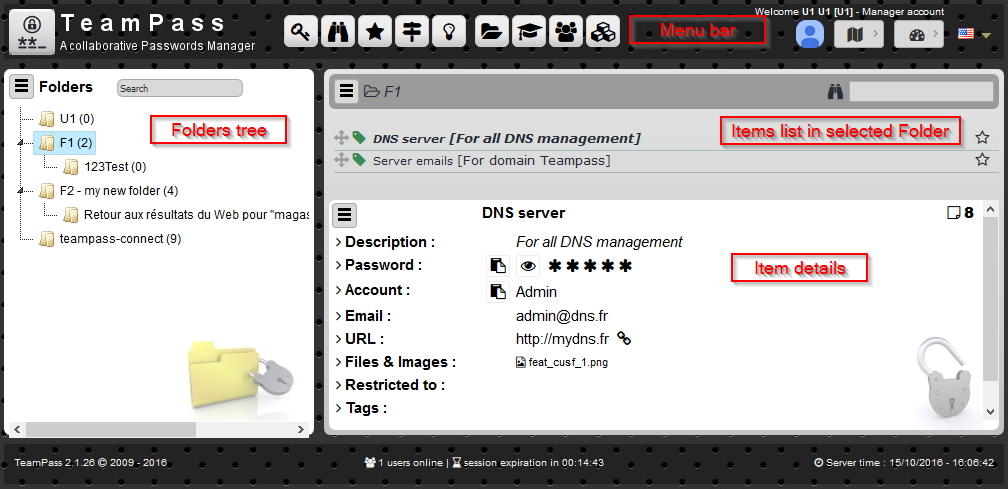
The main screen is devided in 3 main parts. Each of those parts has its own sub menu which allows to perform specific actions on Folders and Items.
Folders tree
The Folders Tree shows the folders the user is allowed to see and access.
Click a Folder to see the related Items.
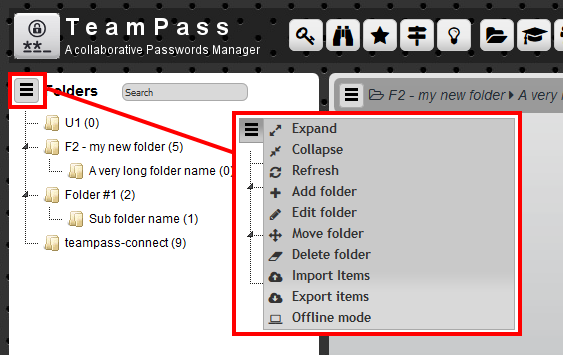
Clicking the Folders Menu brings up a list of possible actions. The actions list depends on the enabled options.
Items list
Contains the Items stored in the selected Folder. The list shows the Item label and the Description. For each Item, small icons are displayed allowing you to quickly perform actions on the items such as copying to your clipboard Password and Login (if enabled).

A user can move can move an Item to another Folder if the drag and drop capability is enabled for that user.
Item details
Displays the details for the selected Items.
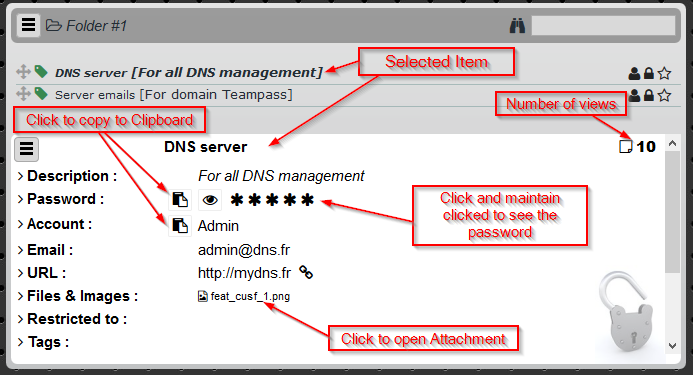
The Item detail area permits the user to see all data related to an Item.
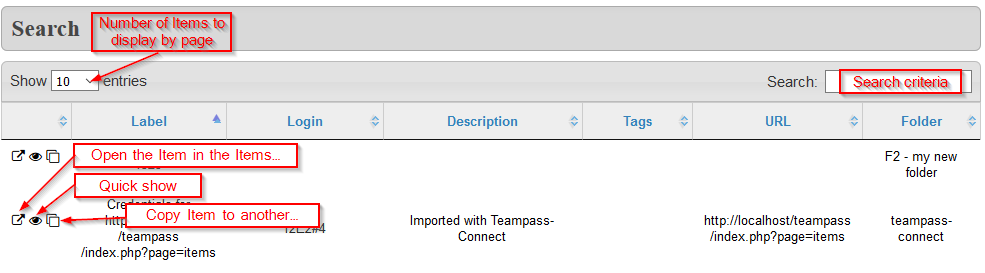
Searching Items
You can perform a search inside a specific page.

The Items are shown in a table format in which you can perform a search using selected criteria. These criteria perform the search across several fields.
Adding a new Item
If you have the privilege, you can add a new Item.
- Select the Folder you want the Item to be added in
- Click the Items List menu button
- Select
Add Item
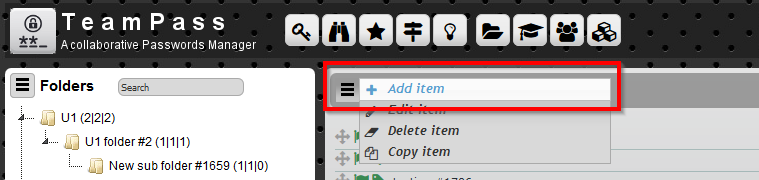
A dialog box will permit you to define your new Item.
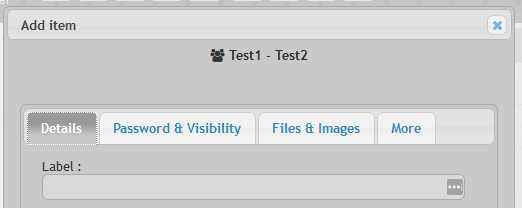
Notice in top of the dialog box, the name of Groups that can access this new Item.
Editing an Item
If you have the privilege, you can edit an existing Item.
- Select the Folder you want the Item to be edited
- Click the Items List menu button
- Select
Edit Item

Edit the Item with the opened dialog box.
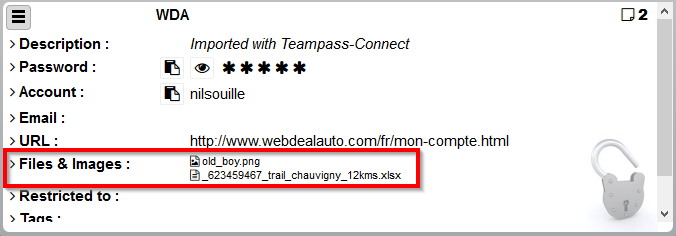
Attach files to Item
You can attach files to your item. In case it is an image, Teampass displays it through a Viewer.
To attach files,
- select tab
Files & Images
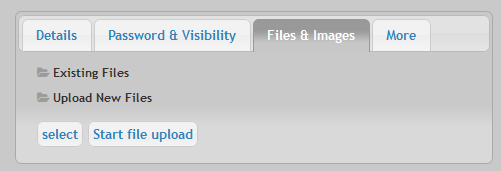
- Click
Selectand select the files to attach - Click
Start file uploadto upload the selected files.
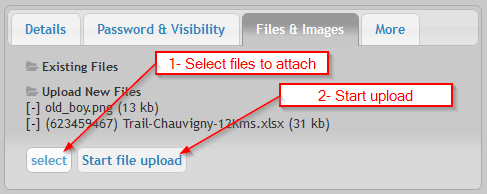
- Now save
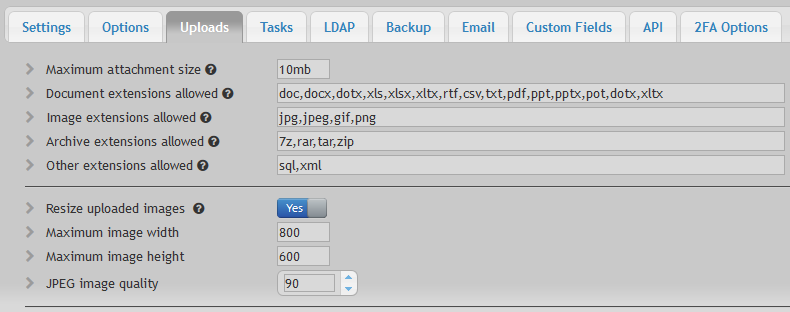
Several options can be defined by Administrator to fit security rules. It is possible to:
- limit the files extension
- limit the maximum size of an attached file
- resize the image
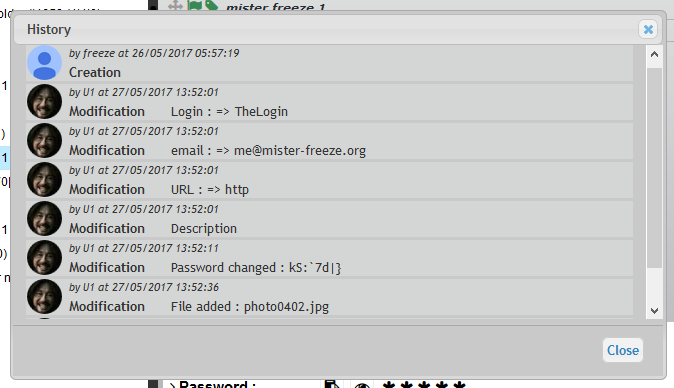
Item History
Any action performed on an Item is logged in the database with the date/hour, the User and the action. Accessing to the Item History is acheived as below:
- Open an Item
- Select
Historyin the Item Menu button
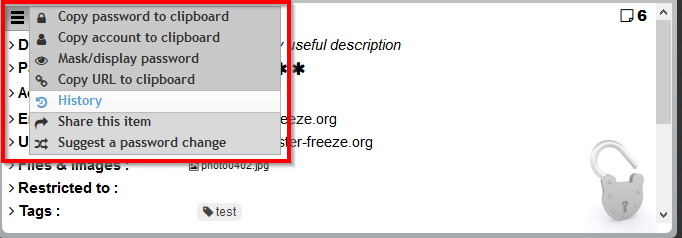
The Audit Trail is shown in a specific dialog box.
Delete an Item
You can delete an Item. To do so: select the Item do a click on the top Item menu button * select "Delete item"
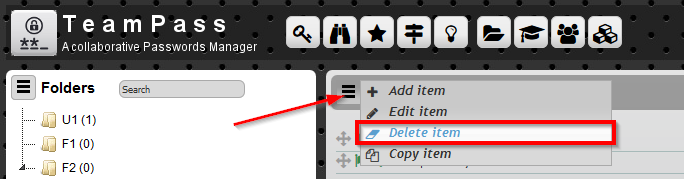
- confirm deletion
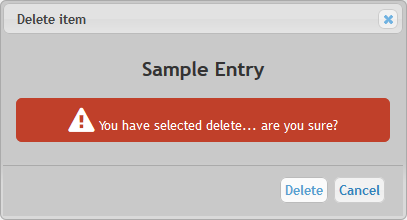
A Deleted item is only disabled and not deleted from the database. It is possible to restore it unless it has been purged.
Restore an Item
A deleted item can be either restore back to its previous position, either purged away.
To do so:
be logged as a Manager or Administrator
select Utilities view

- select tab
Deletion - select the Items to Restore or Delete
- click button corresponding to your choice
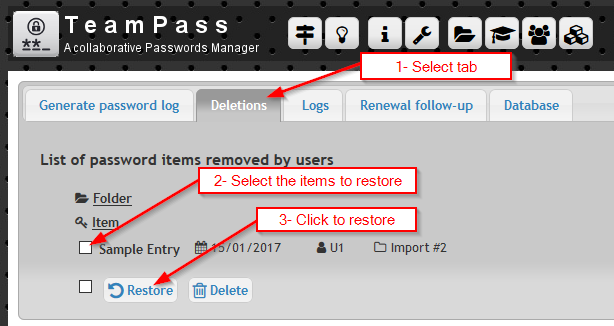
If you decide to Delete, the selected Items will be purged from the database.
If you decide to Restore, the selected items will be restored at their previous position.
Mass move & delete
[Introduced in 2.1.27]
Mass operation permits you to select a set of Items and perform a common action on them. Currently, you may either Move or Delete a set of Items.
This feature is only allowed if the setting Allow user to perform massive move and delete operations is set to Yes.
Performing mass operation is possible from the page called Find.

When the user has the right to either move or delete an item, a checkbox is added in front of its label.
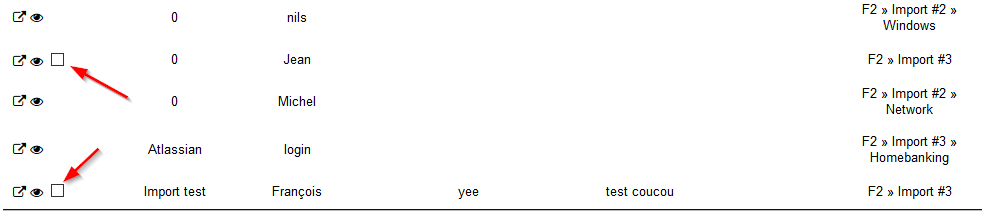
You may select as many items you want.
Using the icons, you can decide to launch the action you want.

Moving items
Select the destination folder and click on OK button.
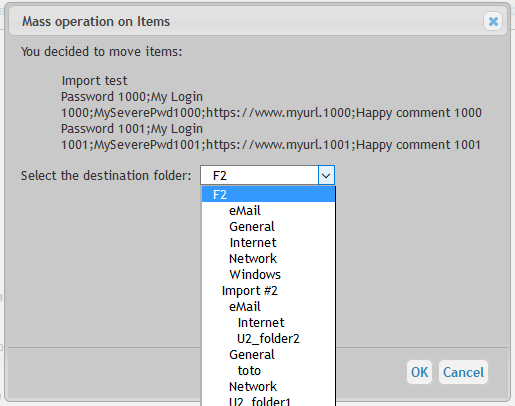
Wait until the dialog box is closed.
Deleting items
Confirm the deletion by clicking on OK button.
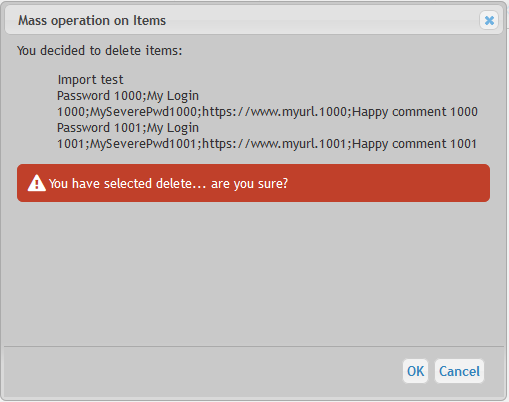
Wait until the dialog box is closed.
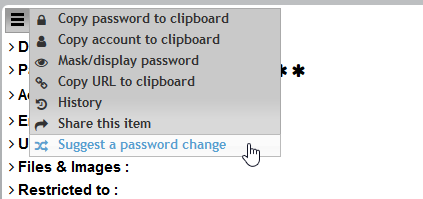
Suggest an Item change
[Introduced in 2.1.27]
Suggesting a change on an existing item is possible. The user may suggest a change for Label, Password, Login, Email and Url.
Making a change proposal
Select the Item on which the change proposal has to be made
Change the fields you are interested in. You may also add a comment that will help the Manager to know the context of the proposal.
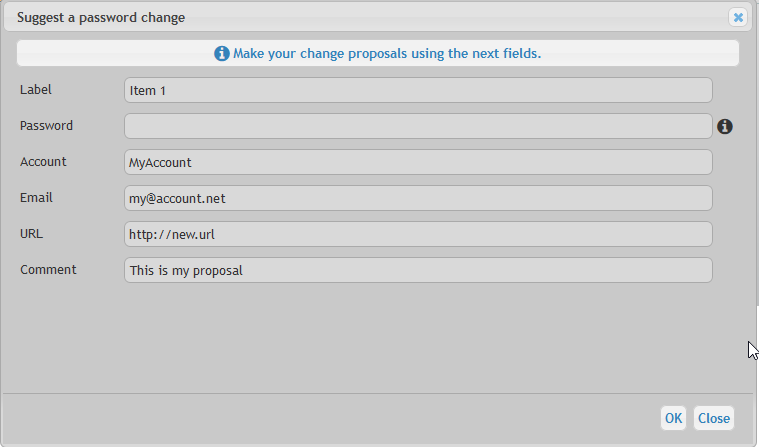
Click to confirm your proposal. An email is sent to the Managers to warn about a new proposal.
Approving / Rejecting a change proposal
Once created, the change proposal is stored in database. When the user is a Manager, he will be warned by the blinking icon.

Click to open the Suggestion view and click the tab Change proposals
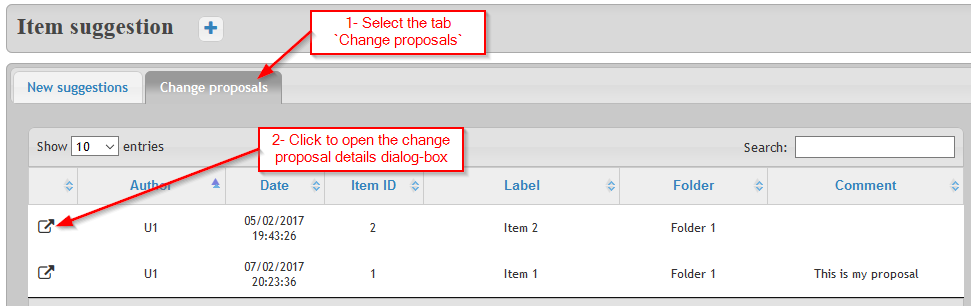
This shows all on-going change proposals that are still pending. Click the icon to open the details about the change proposal.
The dialog box shows the current values in the fields for the Item, and the proposed one.
The Manager can Approve or Reject using the buttons.
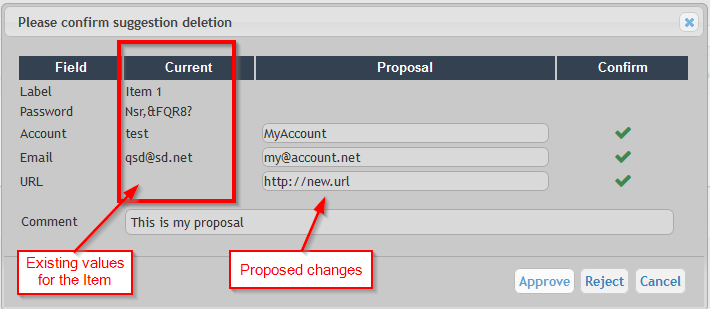
Notice that the Manager can decide the fields to be updated. Meaning that the user may propose a change on fields Login and Email, and the Manager can only accept the Login change.
To do so, click on the Green tick to cancel the field change.
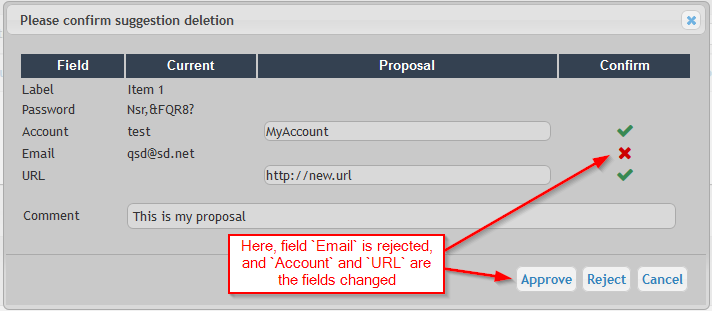
All changes are logged into the Item history.